Monday 30 June 2014

Coupage: Pale Saison and Apricot Golden Sour

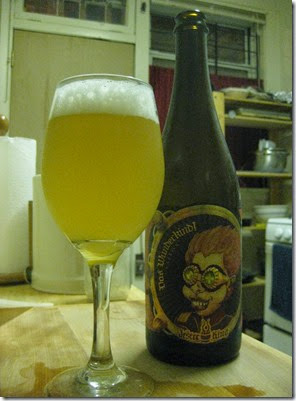
Das WunderkindBefore writing my earlier post about blending saisons and biere de coupage, I sent emails to a few of the breweries I mentioned to see if they had any advice about brewing such beers.  A few weeks after I posted, Garret Crowell from Jester King was kind enough to send me a response to my questions.  Besides asking about the beers brewed for blending, I had also asked about how the flavour profile changed as a result, and whether they blended anything with the larger proportions of old beer that Yvan de Baets mentioned in his essay. I’ll repeat part of what he said in full (and I should also mention that that there is a lot of good information in his AMA thread at TalkBeer):

At first, the blended component is subtle (at the rates we blend) but over time, further subtle fermentation takes place and can increase acidity. The most apparent evolution is the increased presence of Brettanomyces.We have done blends with higher percentages of older beer. Hibernal Dichotomous has 25% sour barrel stock blended in. As a result, the beer was more acidic from the beginning than Das Uberkind. Beyond both components of the blend being dry/done with fermentation, there aren't any special requirements for making biere de coupage. We look for a nice level of acidity in the older beer. Oftentimes, if a barrel aged beer is too sour, it can be blended out with non sour beer to balance it.

Last night J and I drank the bottle of Das Wunderkind that she bought back from her last trip to Houston, and we were both impressed by its subtle but complex mix of lemon rind and earthy funk.  Our bottle was dated back to February this year, and was only lightly tart---not much more so than an older bottle of Noble King that J picked up on the same trip.  Unfortunately she didn’t have room for more than one bottle, so we won’t get a chance to see how it ages.

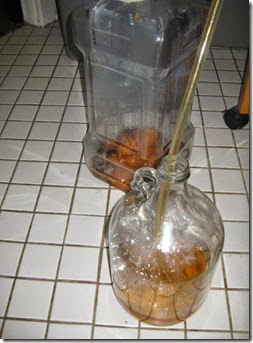
Anyway, I’ve been keen to try this technique for a while, but didn’t have any pale sours on hand ready for blending. However the other day I transferred a 10 month old golden sour onto a blend of freshly frozen and dried apricots, and while racking I siphoned off around 2 litres for blending. I transferred this into a 3 gallon better bottle, and then filled it to near the top with a young saison fermented down to 1.000 with Wyeast 3711. I also added a mixed dry hop of Crystal and Triskel.

 
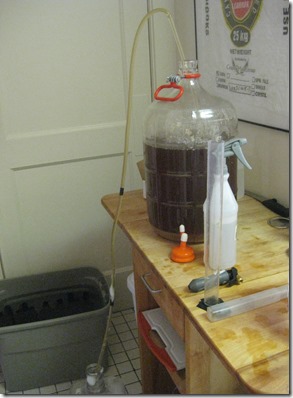
Siphoning off some of the old beer
The old beer was also dry (I didn’t take a fresh measurement, but last time I checked it was around 1.002), and at best moderately sour (hence the apricots!).  I didn’t taste the combined beers at blending, but I thought that at the proportions I used here---around 15% sour beer to 85% fresh beer---the tartness wouldn’t be particularly pronounced.  I was surprised, then, on bottling the beer yesterday, to find that it had a definite tartness, verging on a light but juicy stone fruit sourness.  The bitterness from the hops gave it a slightly metallic edge, but I got the same flavour in BFM √225 Saison, which I enjoyed immensely, so I’m not too worried.  Based on what Garrett Crowell said in his email, I’m hoping that the acidity will increase somewhat as the beer conditions in the bottle, and if nothing else the brettanomyces from the older beer should change the flavour profile over time.

We’ll see how the beer conditions, but its exciting to see that even such a small portion of sour beer can noticeably shape the beer’s flavour profile.  This already differentiates the technique from simply bottle-conditioning with brett, though it should hopefully have some of the same effects as the beer ages.   Later this month I’ll be cutting some fresh dark saisons with a larger proportion of aged beer (more on that in a week or two), and by the end of the summer I hope to have some more pale sour beer to use in this way.  I also have another plan, which I’ll post about some time in the next few weeks, which should mean that I eventually always have some pale sour beer on hand for blending in this manner.  All of this will enable further experimentation.

Update: Tasting Notes for the saison.

Tuesday 24 June 2014

Beer Food: Limburger Sandwich

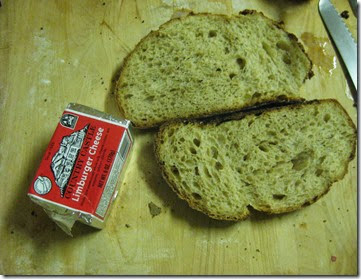
Limburger and Nancy Silverton Normandy RyeHere’s one for fans of funkier flavours: classic, working-class beer food that’s now probably an acquired taste.  Limburger starts off as a crumbly, salty cheese a lot like feta, but as it ages bacteria on its rind turn it into a pungent and creamy soft cheese.    The smell can be a bit of a shock if you’re not prepared for it: body odour, cheesy feet, that sort of thing. But the taste is actually fairly mild, at least at around 5 months which is when I prefer it.  After that it gets more savoury and tangy and can be a bit much for some people.

I didn’t know what I was buying the first time I picked some up: it was on sale, and I vaguely recalled hearing about it in some connection with beer.  Here’s what Wikipedia told me when I got home:

“In the early 20th century, Limburger sandwiches became a popular lunch for working people due to their affordability and nutritious qualities. They were frequently accompanied with a glass of beer.”

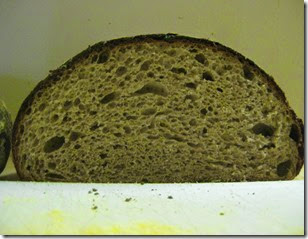
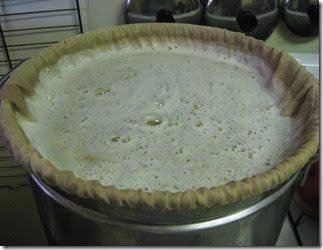
Tartine RyeApparently the sandwiches are traditionally made on dark rye bread.  I’ve never baked anything quite that dark, so when I’ve had these sandwiches in the past few months I’ve used slightly lighter rye breads.  One is Nancy Silverton’s Normandy Rye---something I started making to use up a bad batch of dry cider (pictured at start of post).  The other is a 20% rye loaf from the new Tartine Bread book (pictured right).

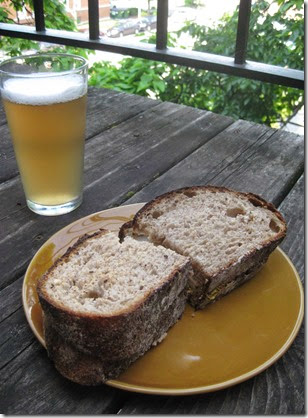
IMG_1836Besides slices of Limburger, the filling I use consists of sweet vidalia onions and spicy brown mustard, which play really well with the creamy cheese.  Other people include pickles, anchovies, and similar flavours. Finish it off with a glass of Table Beer I, and you have the perfect brew day lunch!

Next thing I want to try: boterham met plattekaas en radijzen and gueuze.

Monday 23 June 2014

Tasting Notes: Table Beer I

This is the first of two table beers I made earlier this summer.  As a recap, the idea (borrowed from Basic Brewing) was to make a pale hoppy beer with a grist consisting entirely of wheat and rye malt.  It was fermented with The Yeast Bay’s Vermont Ale strain, and came out at 2.4% ABV.

Table Beer I

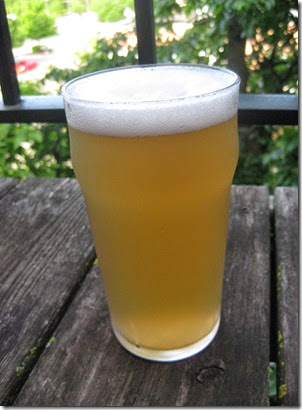
Appearance: Pale, hazy straw colour.  Thick head that lingers for a good while.

Smell: Berries and stone fruit. J says passion fruit, but I don’t know what that tastes like.  Slight dankness.  Very pleasant.

Taste: Follows nose, but not as pronounced.  A touch grassy.  Some sweetness from the wheat, quickly transitioning to a very firm bitterness.

Mouthfeel: A bit thin, but pretty great considering that its only 2.4%.  Bitterness and relatively high carbonation make it a little astringent, though for me not unpleasantly so.

Drinkability & Notes: Very happy with this one.  The taste and flavour aren’t particularly remarkable---its not going to win any competitions---but its tasty and very drinkable, which is exactly what I was going for.  Most of the batch has gone already, and since I’ve been off work this week I’ve enjoyed one with lunch more than once.  If I were making this with someone else in mind I might dial back the bitterness slightly---it is a bit harsh and biting

Sunday 22 June 2014

Blending: Brown Saison

BlendingIt only seems honest to post about projects that go wrong here, along with those that have some success.  I've written before about my first attempts to make a quick sour using only lactobacillus and brett.  The first iteration came out too thin and one dimensional, but I kept it in secondary with the intention of brewing a second beer to blend it with.  My thought was that I could make something dry but with a thicker body to compensate for the flaws in this first beer, and blend it back with the original.  I planned to achieve this mouthfeel by using a yeast that produces a lot of glycerol (WY3711), and by adding some protein-rich adjuncts to the mash (flaked oats), with the envisaged result being something fairly malty that would provide a nice contrast to the sharp but fruity flavours of the sour beer.

The first difficulty with this plan was that I'm not very good at coming up with recipes for dark saisons, and there aren't many sources you can look to for inspiration, especially in the gravity range I like to brew in.  For instance, Michael Tonsmeire has a series of dark saisons on his website, but these tend to be bigger beers intended for long term aging.  One problem is that getting the right colour in a lower gravity beer can be tricky---this beer was supposed to be brown, which isn't so hard, but I've also been trying to make some darker farmhouse ales recently and there the problem is more pronounced.  I also just don't have a good enough understanding of how darker speciality malts will affect the flavour profile of a saison.  Most of mine are very pale, and even the English beers I brew don't typically use more than a few percentage points of dark crystal.  I've brewed some darker sours I've been happy with (Flanders Reds and Browns), but none started with a saison base. Since I don't know what I'm doing, my recipes often end up very cluttered, based on whatever darker grains I have lying around, which means that my own few attempts at darker saisons often end up tasting flat or muddy---nothing like the beer I had in mind.

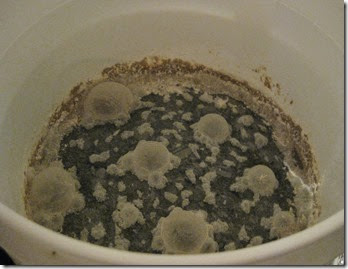
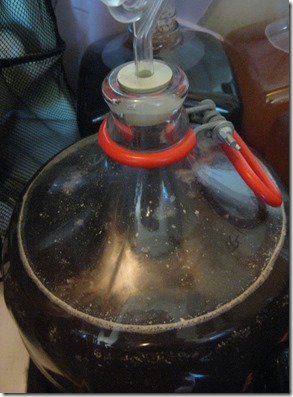
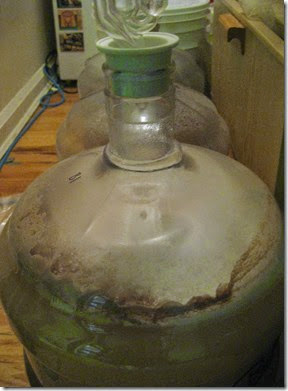
Pellicle!The second difficulty came when I opened the bucket containing the new beer on blending day, and was greeted by a nasty looking pellicle!  This is the first 'clean' beer I've brewed that has definitely picked up an infection---not a problem, you might think, since it was going to be blended with a sour beer anyway, but besides general concern over my process (I want my clean beers to stay clean!) it also had a negative effect on the flavour profile of the beer, leaving it muddy and slightly tart.  Luckily I have a pretty good idea where the infection came from.  Its possible its from the bucket or the tubing I use to transfer beers, but a more likely candidate is a turkey baster that I use for sampling sour beers.  I snuck a taste with this a few days into fermentation, and while I always sanitize it first and usually only use it on beer that are already infected, this time I was not so careful.  I'm going to brew another beer in the bucket this week to see what happens, and I'll probably mark it for mixed fermentations only in future.

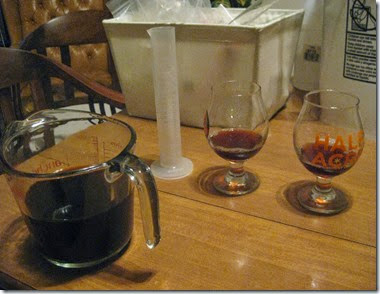
That still left me with the question of what to do with the beers.  Since I had everything ready for blending, and I didn't much feel like brewing another batch, I decided to go ahead with my original plan.  I transferred out around 500ml of each beer, and tried blends in different proportions: 70/30, 60/40, 50/50 of each beer (so five blends total).  Frankly, it wasn't a particularly fun experience!  Trying to blend two beers you're not very excited about is demoralising.  The ‘old’ sour beer tasted thin and had too much oak, but the acidity was nice and there was still the fruitiness from the cherries.  The new beer tasted tart and muddy, but had a decent mouthfeel in contrast to its partner.  Eventually I settled on a blend of 30% old sour to 70% young saison, and transferred the remaining beer in roughly these proportions to a five gallon carboy.  I say roughly because I was about 0.5 litres short of the young beer, so I compensated by adding a little more of the older one to make sure there was no headspace in the carboy.  If I'd been thinking more clearly, I might have transferred the rest of the old beer into a gallon jug for future blending, but I was so fed up by that point that I just poured the rest of it down the drain.

I'm going to let the blend sit for a few months before deciding what to do with it.  The saison portion is still pretty young, so there's a chance it will become less muddy as it ages.  There is also a chance that the Brett Trois from the sour portion might do something interesting with the flavour profile.  But to be honest I'm not holding my breath---I suspect this whole project will end up down the drain.

Monday 16 June 2014

In Perpetuum: Farmhouse Ale

Transferring old beer onto dry hopsThe scale of most of the homebrew solera projects I’ve read about is beyond my means right now---I don’t have room for a barrel, and it would take me weeks to fill it even if I did.  But there’s no reason not to try something similar on a much smaller scale, and I have a couple of solera-style projects planned for this summer.  This post is about the first: a low gravity, hoppy farmhouse ale based on Jolly Pumpkin’s Bam Biere.

The original batch consists of around 4 gallons of a Bam Biere clone that I brewed at the start of the year.  The plan was to brew 5 gallons and drink it all this summer.  Although five gallons is more than my system can usually handle, I was trying to dial in a BeerSmith set up that would let me liquor down after the mash to reach the full volume for the boil.  Something went wrong, either with the BeerSmith profile or my process on brew day, and I ended up with 4 gallons of 1.042 wort, rather than 5 gallons of 1.037.  I should probably have added water to the fermenter once I realized this, but I decided to just keep the beer as it was.

Transferring fresh beer onto the baseFast forward several months, and its time to transfer the beer onto the dry hops.  Rather than doing this with the full batch, I decided to siphon off 3 gallons into a Better Bottle with the dry hops and keep the remaining gallon to cut a second beer.  A few weeks ago I brewed up another batch of the base recipe, but in keeping with the “Farmhouse Ale” moniker, I substituted grains based on what I had available: in place of the flaked barley and Crystal 80 in the original I used unmalted spelt and English Medium Crystal.  Today, after I transferred the 3 gallons of the original onto some Triskel hops, I added around 3.5 gallons of this fully fermented new beer onto the remaining gallon of the original batch. 

My process here is based closely on Ron Jeffries’s at Jolly Pumpkin (which you can now read about in Chapter 5 of American Sour Beers!), but it also fits the practices Yvan de Baets describes in his essay on historical saisons.  At Jolly Pumpkin the fresh beer is fully fermented with a sacchromyces strain before the wild organisms are added by transferring the beer into barrels that have active colonies of brettanomyces and LAB.  This should suit this pseudo-solera style project, since the low gravity of the young beer should prevent the base from getting too sour as it receives fresh batches.  My thought was that I could do a new pull every couple of months, transferring 3 gallons onto (different?) hops and replacing it with another 3 gallons of young beer brewed to a similar recipe with whatever grains I have available.  The result would be a hoppy, sour Farmhouse Ale in perpetuum!

Too much head space!That, at any rate, was the plan.  Unfortunately when I transferred the beer this morning I picked up a bit of acetic character in the base.  Since I was short on the original batch there was a fair bit of head space left in the fermenter, and I’ve definitely opened it once or twice over the last few months to see how it was getting along.  The relatively large amount of oxygen in contact with the beer, combined with the warmer temperatures in the last month or two might have provided the perfect environment for acetobacter to thrive. If that is what’s happened it may only get worse as this second beer ages.  There is still some headspace at the top of the fermenter, and the temperatures are only going to get warmer as the summer progresses (I have limited temperature control beyond my fermentation chamber, so I spend the hot Chicago summers worrying about my sour beers).  One option I might take would be to top the carboy up with another beer so that there was no headspace at all.  From reading American Sour Beers I learnt that Vinnie Cilurzo at Russian River keeps some fairly neutral low gravity beer around for just this purpose.

My original plan was to let this second batch age all summer, but if I don’t top it up what I may do instead (assuming it doesn’t all turn to vinegar!) is pull the next 3 gallons in a month or so and then make sure I have enough to completely fill the fermenter afterwards.  Since the base beer is pretty dry when it goes into the fermenter, I could probably package it on the earlier side if I used heavy bottles and took the remaining gravity points into account.  In fact, since there should be healthy colonies of brettanomyces and LAB in the base beer, it may even be done by then---based on what he says in this interview, I think Ron Jeffries only leaves Bam Biere in barrels for a few weeks.  So I guess I’ll either top it up this week, or open the fermenter again in a month and see what’s happened.

Update: The thought of ending the summer with 5 gallons of malt vinegar has been niggling at me all day.  Luckily, in keeping with my usual practice I saved and strained the left over kettle wort from the rye saison I brewed this weekend to make starters with during the week.  When I got home this afternoon I watered some of this down, boiled it briefly to kill anything that had started to grow in the wort, and topped up the carboy until it was nearly full.  The wort isn’t an exact match to the Farmhouse Ale, but it shouldn’t change the flavours much, especially in such small quantities.  Hopefully the small fermentation caused by the fresh wort will flush any remaining oxygen out of the carboy.  Of course, there’s nothing I can do about the high temperatures that will surely come this summer.

Sunday 15 June 2014

Beer Food: Sour Beer Sorbet

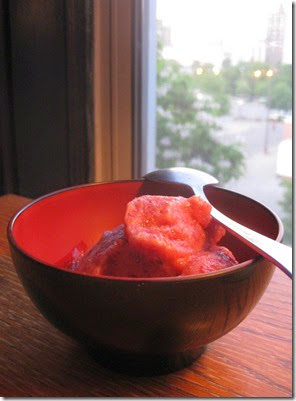
Sour Beer SorbetMichael Tonsmeire’s new book American Sour Beers arrived on Friday, and I spent this weekend reading it from cover to cover.  Its a great resource, especially for people new to brewing sour beers; but I think even people who’ve done a lot of brewing and research on sour beers will benefit from having all this information gathered together in one place.  Chapter five, which goes through the processes of a number of different breweries, was the highlight for me.  I really enjoy hearing people reflecting intelligently on their process, and at this point its often the thing I learn most from---that goes for brewing, but also for other activities such as baking and even teaching.

Anyway, besides reading the book I also managed to fit in a quick brew day, pitching the second generation of the Wallonian Farmhouse strain into something very similar to this `Farmer in the Rye’ recipe from Ales of the Riverwards.  The brew day was nothing special, so instead of posting about that I thought I’d write about one of the other projects I had going this weekend: sour beer sorbet.

J occasionally makes ice creams and frozen yogurts from this book, and flicking through it one day I noticed a recipe for sour beer sorbets.  The recipe called for adding 3/4 of a cup of lambic to a blend of fresh fruit and sugars.  My first thought was: who the hell can afford to pour lambic into an ice cream!    Most of the interesting flavours will be overwhelmed by the cold, not to mention the sweetness.  But I made a mental note of the recipe, thinking that it might be a good way to use my quick sours if they turned out poorly.

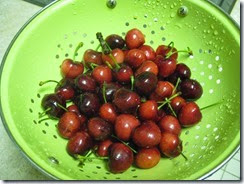
CherriesThis weekend cherries were on sale in my local supermarket, so I decided to take a bottle of my quick sour brown and make a cherry sorbet.  The process is pretty simple: pureeing one pound of fruit, bringing it to a simmer with 3/4 cup of sugar and 1/3 cup of tapioca syrup (or corn syrup), then cooling it down completely and adding 3/4 cup of beer before churning.  Before cooling and churning the mixture, the biggest contribution from the beer seemed to come from the D90 candi syrup I used: as expected, the sweetness from the cherries and sugar suppressed the sourness, bringing out the dark fruit, toast, and chocolate notes from the syrup.

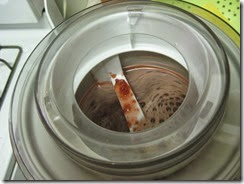
Churning the sorbetBy the time it was cooled and churned, it was hard to pick out the beer at all.    If anything, it maybe added a depth of flavour to the sorbet that would have been missing without it, but this had more to do with the candi syrup than the sourness of the original beer.  Using a more sharply sour beer (maybe with sour cherries as well) might have helped accentuate its flavours, but all we ended up with was a tasty but sweet cherry sorbet.

So, not a complete success, but I’m glad I tried it.  I should have some more posts later in the week about beer related projects.

Sunday 8 June 2014

Brew Day: No Boil Sour

Protein RestI’ve managed to brew a lot this week, even though I’ve still been meeting with students as the school year wraps up.  Much of what I’ve brewed is intended for blending with older beers that have been in secondary for a few months, so since there was nothing special about the brew days I’ll post about them all once I decide on the blends.  The beer in this post is something like a berliner weisse, fermented with a blend of  Brett Trois and Brett C, along with a large pitch of lactobacillus.  If it turns out well, some of it will also be used for blending.

I’ve brewed quite a few berliner weisses over the last year, and the technique I use is based on the one that Kristen England outlines in Brewing with Wheat (he also talks about it a bit in this old thread from the Northern Brewer forum).  England uses a simple grist of 50% wheat malt and 50% pilsner, puts it through a step mash with a decoction, skips the boil entirely and pitches a large amount of lactobacillus along with sacchromyces at a ratio of between 3:1 and 5:1.  I’ve followed this process to the letter before, and made very good beers with it, but this time I used a variation that I’ve also had some success with: a step mash without a decoction, and a pitch of brettanomyces instead of sacchromyces.

The lactobacillus I used originally came from a pack of Wyeast Berliner Blend that I bought for cheap because it was way past its best by date.  I split the pack into two starters, one made with malt and hops to favour the yeast, and another made with apple juice to favour the lacto.  This was what I used in my first berliner, but I kept back some of the apple juice starter and I’ve been feeding it and re-pitching it successfully ever since.  I usually feed it a few weeks before I’m going to use it, and occasionally put it in the fridge if I know I won’t be using it for a while (apparently lactobacillus will eventually lower the pH enough to kill itself off, so putting it in the fridge is a way of slowing it down a bit).  I have no way of calculating a 5:1 pitch rate, so I usually just decant most of the jug (it clears after a few weeks, and you can see the wispy lacto at the bottom), and then pitch most of what’s left.

I also keep starters of brettanomyces strains in half gallon jugs, and grow these up as I need them.  In the past I’ve just used Brett Trois for these beers, but this time I decided to grow up a blend of Brett Trois and Brett C: the Trois starter was fed more recently, so I imagine it was healthier and ended up making up more of the final blend.

FermentationSome people like to give the lactobacillus a head start by holding back the yeast for a few days before pitching.  I’ve never had any trouble getting enough sourness with my technique so far, but I do worry about it, especially when the lactobacillus starter hasn’t been used for a while.  I’m hoping that the smaller size of the brett starter, along with the fact that it grows fairly slowly compared to sacch, will give the lactobacillus plenty of time to sour the beer before the yeast dries it out.  I decided to try doing this batch without any temperature control, and fermentation was pretty furious this morning.

When I’ve used this process in the past, its made sour and refreshing beers that I’ve been pretty happy with.  The brettanomyces doesn’t seem to be fazed by the acidity created by the lactobacillus, and it dries the beer right out and adds a nice fruitiness as it ages in the bottle.  (You can read comments from a competition score-sheet for one of them in this post.)  One place in which I think the brett versions I’ve made have been lacking is in the malty/wheaty flavours that were there when I used a german ale yeast and a decoction, and I think I ultimately prefer that process when I’m making a straight berliner weisse.  However I have other plans for this batch. 

Some of it will end up on fruit, probably raspberries or maybe peaches (I’ve had some success doing this before, but not with these fruits).  Assuming it gets sour enough, the rest will be used for blending with fully attenuated saisons in a few months time.  My thought its that this will be a way of adding some tartness to hoppy beers, but also a way of dosing them with brettanomyces right before they go into the bottle.  I wrote about this in an earlier post, and I’ll be trying it with some other beers soon.  It seems to be the technique that Chad Yakobson uses for making some of the beers at Crooked Stave:

“The other one is Petite Sour, which as well is going to be a full time year round beer. This beer weighs in at about 4% and the idea behind it is my version of a table beer. It’s Berliner Weisse meets Gose meets Farmhouse Wit, so it’s a tart witbier. It has an acidity level but it’s tame. It has the fruitiness from the brett (which is very characteristic of our beers as it is) but also some of the beer background as well because it’s a blend of a 100% brett beer blended with a saison farmhouse type wit which is not in oak. That beer marries all these flavors together to where it’s approachable. It’s light, crisp, clean and lemony.”

Recipe:

   
Estimated O.G. 1.033    
Measured O.G. 1.033    
Measured F.G.      
ABV.      
       
Mash:      
  133°F 60 mins  
  150°F 40 mins  
  160°F 15 mins  
  170°F 10 mins  
  No Boil    
       
Malt:      
50% Pilsner (Dingemans)    
50% Wheat Malt      
       
Hops:      
Crystal Mash Hop ? IBUs (5g @ 4.8%)
       
Yeast:      
WLP644; WLP645; lactobacillus.      

Sunday 1 June 2014

Brew Day: Yeast Bay Saison Blend

Classic SaisonThis morning I brewed another saison with the second part of my last Yeast Bay order: the Saison blend. I wanted to go with a fairly straight-forward saison recipe to see what the blend contributed, so I used Phil Markowski’s “Saison – classic version” from Farmhouse Ales.  I almost always use some variation on the grist from this recipe when I brew a saison, but I lower the gravity and up the bitterness by quite a bit. In fact, I remember when I first read the book I was confused and disappointed by the fact that the recipes at the back didn’t seem to fit the descriptions of saisons provided by Yvan de Baets in the earlier chapter.  That said, it probably does fit with what people expect from a saison (i.e something like Dupont), and I suppose that’s not a bad thing, so today I basically went with what was printed.

I’m hoping to pitch the second and third generations of this blend into other batches: the recipes will depend on how this first one comes out.  I have never used a blend of saccharomyces before (only saccharomyces/brettanomyces), so it will be interesting to see how the blend changes over time.  I suppose it will depend on the growth rates of the two yeasts, as well as their flocculation (I’ll be harvesting from the primary fermenter in a week or two).

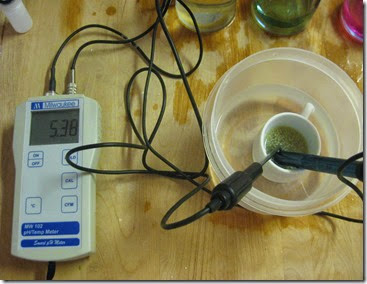
pH meterBut the yeast strain isn’t the reason I’m posting about this brew day.  Today was the first time I used my new pH meter to check on things in the mash and boil kettle.  I ended up getting the Milwaukee Instruments MW102, which seems to be the standard one at this price offered by most homebrew stores.  I was torn between ordering this from Amazon, or ordering the Hach Pocket Pro+.  The latter was recommended by ajdelange on HBT, and seems to be getting positive reviews from other home brewers.  But the wait time for ordering was significantly longer, and with shipping and tax the whole was 20-30% more expensive, so I decided to stick with the Milwaukee model (or rather J did, since it was a birthday present).  Hopefully I won’t regret that choice! It occurred to me today that its the single most expensive piece of brewing kit I have: obviously I’ve spent a lot more than $100 over  time on fermenters, grain, hops, etc., but everything else I’ve got on the cheap.
I’ve been using Bru’n Water to estimate mash pH for a few months now.  Chicago water has pretty high residual alkalinity, meaning that its good for brewing dark beers but needs some adjustments if you want to hit the right pH for anything light.  I’ve been using lactic acid to modify mash pH for a while now, and occasionally adding some salts as well.  Today I went with something like Bru’n Water’s “Yellow Balanced profile”, adding 5ml lactic acid along with 3g gypsum and 1.5g calcium chloride.  The result should be something like the following:


Calcium
77.2
Magnesium 11.8
Sodium 8.4
Sulfate 95.2
Chloride 44.5

Bru’n water estimated a mash pH of 5.4.

I was excited to finally check some of this with the meter. They seem like finicky things, and its hard not worry that you have a dud out of the box.  The conditioning and calibration were easy enough, but it took the meter a couple of minutes to settle on a stable reading: hopefully that’s not a sign of problems to come.  I withheld some of the acid addition from the kettle in case Bru’n Water was wrong, but the first reading, taken at 10 minutes into the mash, was a little high at around 5.6.  I added the rest of the acid and stirred the mash for a minute or two, then took another reading, which eventually settled at around 5.4---exactly what Bru’n Water predicted with the full mash additions. 

Its reassuring to know that the program is fairly accurate, since I’ve been relying on it “blind” for the past few months.  Of course, there’s still the worry that the additions I have to make for pale beers are large enough to affect the final flavour profile: a bit of lactic tang isn’t going to be out of place in a saison, but might be in a light bitter, and certainly would be if I start making lagers.  I live across the road from a store, so it wouldn’t be too hard to occasionally cut my brewing water with some distilled water.  Perhaps I’ll experiment with this over the next few months, but I don’t want to rely on it regularly.  Instead I’ll probably handle this by only occasionally brewing styles that might be a problem.

After the mash, the pH had drifted up to around 5.5, which fits with what I expected.  Twenty minutes into the boil, it was at back down to around 5.4.  I learnt from Michael Tonsmeire’s blog that boil pH is also important for hop utilization and formation of hot-break, along with predicting final beer pH.  I think people aim for 5.1, so I was a little high (assuming that 5.1 is at room temperature), but I didn’t want to fuss with further additions for this first attempt.  I’ll measure the pH of the final beer as well after fermentation is complete.

The rest of the brew day was pretty standard.  I gave it about 40 seconds of oxygen, and set it in the fermentation chamber at 68°F.  I’ll probably just take it out after 24-36 hours and let it free rise after that.

Update: Tasting Notes.

Recipe:
   
Estimated O.G. 1.052
Measured O.G. 1.054
Measured F.G. 1.004
ABV. 6.6%
Mash:
149°F 90 minutes
Malt:
90% Pilsner (Dingemans)
10% Wheat Malt
Hops:
Hallertau (U.S.) 60 28 IBUs (26g @ 5.4%)
East Kent Goldings 15 3.8 IBUs (12g @ 5.9%)
East Kent Goldings 2 2.4 IBUs (12g @ 5.9%)
Styrian Goldings 2 0.9 IBUs (8g @ 3.5%)
Saaz 2 0.6 IBUs (5g @ 3.5%)
Yeast:
Saison Blend